Space Tab Content
Space Tab Content
This step allows you to set up and configure the bulk of your sponsor space content, which is displayed in a tab format within your space.
You can link your tab to the documents and links that you uploaded in the Documents/Links step, redirect a tab to an external web page, or create a custom HTML page to be displayed when the user clicks on the tab. The maximum number of content tabs varies depending upon your event. Consult your event host or your primary event contact for more information. The default setting when adding a new content tab is External Web Page.
Note: Each event has a unique set of content options. All of the tab content types listed below may not be available for your event. Please check with your event host or your primary event contact to see which features are available in your event.
To create a new tab:
- Click Add New.
- Follow the steps below, based upon what action you want to occur when the user clicks the tab.
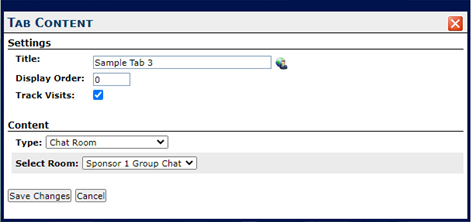
CHAT ROOM:
Use to link your tab to a text-based group chat room in your booth.
Note: If your sponsor space layout has a chat room enabled, there will be an additional tab that expands to display the chat room. A chat room added in the Tab Content step will list the chat room title in the “Content” tab. These two chat room display areas can be set up to link to different chat rooms or the same chat room.
- Enter the tab name in the Title field. The title will appear on the tab that is created.
- Enter a number in the Display Order field. This number determines how your tabs will be sorted: lower number tabs appear at the top.
- In the Content Type area drop-down menu, select Chat Room.
- Activate the Track Visits checkbox to enable this reporting feature. The system will keep track of how many users click on the tab and this information will be available in your sponsor space activity report.
- In the Select Room drop-down menu, choose the chat room that you would like your tab to link to or select Add New to create a chat room. You can create multiple chat rooms using the Add New button.
- Click Save Changes. The created chat rooms will automatically be assigned to the tab content when you save.
EXTERNAL WEB PAGE:
Use to link your tab to a secure external URL.
- Enter the tab name in the Title field. This title will appear on the tab that is created.
- Enter a number in the Display Order field. This number determines how your tabs will be sorted: lower number tabs appear at the top.
- In the Content Type drop-down menu, select External Web Page.
- Activate the Track Visits checkbox to enable this reporting feature. The system will keep track of how many users click on the tab and this information will be available in your sponsor space activity report.
- In the URL section, paste or type in the full path of the page that you wish to link to, beginning with https://. Make sure you are linking to a secure webpage.
- Check Launch in new window if the external webpage cannot be contained within an iframe and is displaying an error when clicked.
- Provide text in the Enter Message Here area when launching the external webpage in a new window. This message will display at the tab content frame. The message should inform attendees that the external webpage has been opened in a new window.
- Click Save Changes.
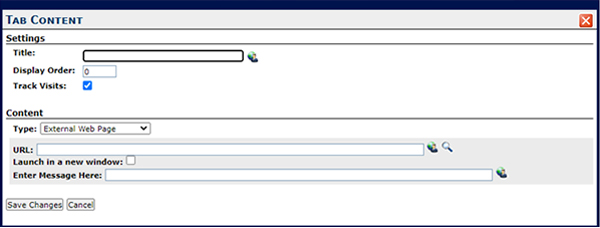
Note: External Web Page URLs can be previewed by clicking on the magnifying glass icon next to the URL field.
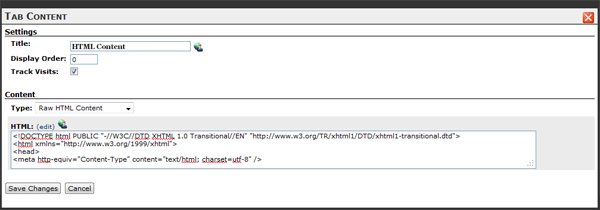
HTML CONTENT:
Use to display a custom HTML page.
- Enter the tab name in the Title field. This title will appear on the tab that is created.
- Enter a number in the Display Order field. This number determines how your tabs will be sorted: lower number tabs appear at the top.
- In the Content Type area drop-down menu, choose HTML Content.
- Activate the Track Visits checkbox to enable this reporting feature. The system will keep track of how many users click on the tab and this information will be available in your sponsor space activity report.
- In the HTML section, paste or type in the HTML code that you want your tab to display.
- Click Save Changes.
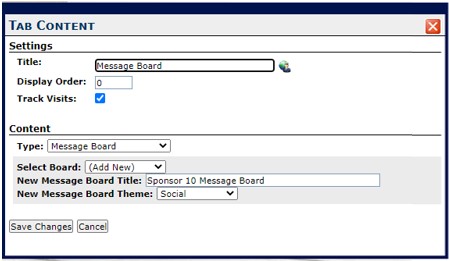
MESSAGE BOARDS:
Use to display a Message Board. A Message Board allows users to create, view, and respond to message board postings. Think of a Message Board as your booth's virtual bulletin board! Message Boards offer users the ability to upload their own content such as images and documentation, as well as like and comment on other users' posts.
- Enter the tab name in the Title field. This title will appear on the tab that is created.
- Enter a number in the Display Order field. This number determines how your tabs will be sorted: lower number tabs appear at the top.
- Activate the Track Visits checkbox to enable this reporting feature. The system will keep track of how many users click on the tab and this information will be available in your sponsor space activity report.
- In the Type drop-down menu, select Message Board.
- In the Select Board drop-down menu, choose from previously created message boards or select Add New to create a new message board.
- Enter a title for your message board and select the Social theme.
- Click Save Changes.
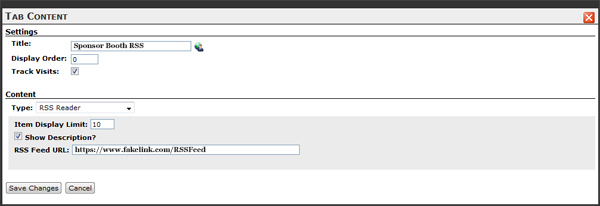
RSS READER:
Use to display an RSS feed.
- Enter the tab name in the Title field. This title will appear on the tab that is created.
- Enter a number in the Display Order field. This number determines how your tabs will be sorted: lower number tabs appear at the top.
- Activate the Track Visits checkbox to enable this reporting feature. The system will keep track of how many users click on the tab and this information will be available in your sponsor space activity report.
- In the Content Type area drop-down menu, select RSS Reader.
- In the Item Display Limit section, enter the number of items that you want to display from your RSS feed.
- Select Show Description if you want to display the description text for each RSS feed item.
- In the RSS Feed URL section, enter the URL to your RSS Feed.
- Click Save Changes.
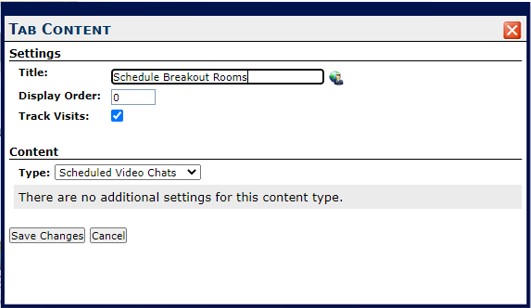
SCHEDULED VIDEO CHATS:
Use to display the list of upcoming scheduled video chats in your booth.
- Enter the tab name in the Title field. This title will appear on the tab that is created.
- Enter a number in the Display Order field. This number determines how your tabs will be sorted: lower number tabs appear at the top.
- Activate the Track Visits checkbox to enable this reporting feature. The system will keep track of how many users click on the tab and this information will be available in your sponsor space activity report.
- In the Type area drop-down menu, select Scheduled Video Chats.
- Click Save Changes.
SELECT DOCUMENTS AND LINKS:
Used to configure tab content by displaying a list of documents and links uploaded in the Documents and Links step.
- Enter the tab name in the Title field. This title will appear on the tab that is created.
- Enter a number in the Display Order field. This number determines how your tabs will be sorted; lower number tabs appear at the top.
- In the Content Type drop-down menu, choose Select Documents and Links or Documents and Links. If you want to display all of the documents and links on one tab, select the Documents And Links content type. If you want to split the records between multiple tabs, choose the Select Documents and Links content type.
- Activate the Track Visits checkbox to enable this reporting feature. The system will keep track of how many users click on the tab, and this information will be available in your sponsor space activity report.
- Place a checkmark next to the documents and links that you would like to display when the user clicks this tab. Note: If you have not yet added the documents and/or links in the Documents and Links step, you should do so at this time.
- Click Save Changes.

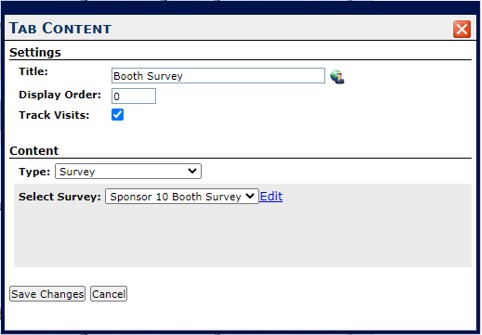
SURVEYS:
Use to configure a survey in a tab in your booth.
- Enter the tab name in the Title field. This title will appear on the tab that is created.
- Enter a number in the Display Order field. This number determines how your tabs will be sorted; lower number tabs appear at the top.
- Activate the Track Visits checkbox to enable this reporting feature. The system will keep track of how many users click on the tab, and this information will be available in your sponsor space activity report.
- In the Type drop-down menu, choose Survey.
- In the Select Survey drop-down menu, choose from a previously created survey or select Add New to create a new one.
- When creating a new survey, fill out the page details on the pop-up Edit Survey page.
- Once you have filled in the information for the survey, click Submit.
- Click Save Changes.
At any time you can go back and edit your survey by selecting the survey and clicking Edit.
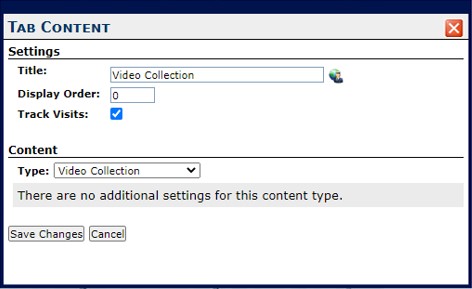
VIDEO COLLECTION:
Use to configure the video collection in the tab content.
- Enter the tab name in the Title field. This title will appear on the tab that is created.
- Enter a number in the Display Order field. This number determines how your tabs will be sorted; lower number tabs appear at the top.
- Activate the Track Visits checkbox to enable this reporting feature. The system will keep track of how many users click on the tab, and this information will be available in your sponsor space activity report.
- In the Type drop-down menu, select Video Collection.
- Click Save Changes.
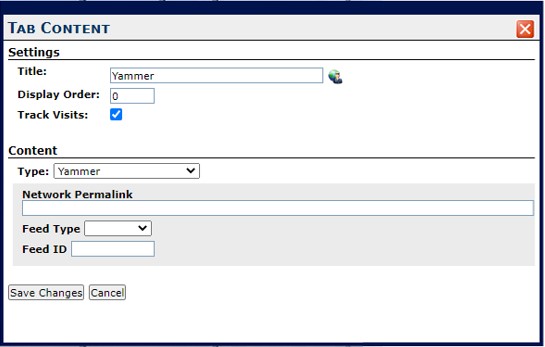
YAMMER:
Use to configure a Yammer feed in your tab content.
- Enter the tab name in the Title field. This title will appear on the tab that is created.
- Enter a number in the Display Order field. This number determines how your tabs will be sorted; lower number tabs appear at the top.
- Activate the Track Visits checkbox to enable this reporting feature. The system will keep track of how many users click on the tab, and this information will be available in your sponsor space activity report.
- In the Type drop-down menu, select Yammer.
- Enter the Network Permalink for the Yammer Feed
- Select the Feed Type by choosing: Default, Group, Topic, or User.
- Enter the Feed ID.
- Click Save Changes.